Tuesday, September 4, 2012

Giant Ginger Cookies


I just found out this morning that I had to do some baking for the kids annual bake sale tomarrow.  I usually whip together some brownies real quick and call it good, however, my husband suggested switching it up this year and maybe doing some cookies.  Sooo, I thought maybe my ginger cookies that I do every Christmas would fit the bill for the bake sale this year.  It's a really great recipe that I get from a popular cook book and all I do is tweak it up just a little bit and my family just loves them. 


First I mixed up the dry ingrediants (except for the sugar).

 
Whip up the shortening for about 30 sec. ( I used butter flavor).

 
Add the sugar and blend it well

 
until it looks about like this.
 
 
Then add the eggs and molasses and blend it well again. 

 
Fold in the dry ingrediants and mix it until it's blended well like dough. 

 
Make into 2 inch balls

 
and then roll in a plate of sugar and set onto an ungreased cookie tray 2 inches apart.
 
 
While I was doing all this our cat, Mischief, decided to settle into the little hamper I keep in the kitchen. I had to take his picture because I think that he's just too cute and I wanted to share.


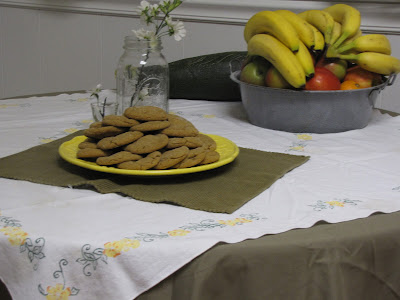
Thanks for that, now okay,back to cookies.  After they bake in the oven for about 10 or 11 minutes they should come looking like this


This batch of cookies came out pretty good.  My family loves them and hopefully they go over well at the bake sale.  My husband brings them into work every year and they are a hit so I'm hoping for the same reslult here.


xoxo
 
The little tweaking I did was to add 2 teaspoons of ginger insead of 4 and I used allspice rather that ground clove simply because it's what I had. 
Happy Baking!


Pin It

Tuesday, August 28, 2012

DIY Junck Jars

We have a junk drawer in our kitchen and quite literally it IS a junk drawer.  You could find everything from twine and ribbon to Lego's.  I've got a bad habit of picking up stuff off the floor when I vacuum and just tossing it in the junk drawer until later (which usually never comes but once or twice a year!)  Well, I went rummaging through this drawer earlier in the week and this is the mess I ended up with.  I thought, OK, enough, what can I do?


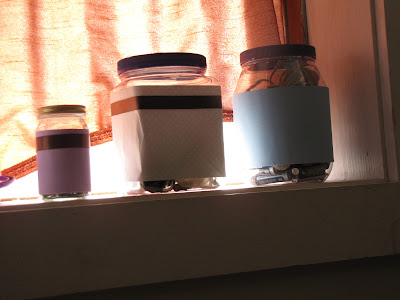
 I've been wanting to make some decorative jars for my office area down stairs and thought that project would work great for what I need here.  I dug through our recycling and came up with these jars. I thought the bigger ones would be good to put stuff in and still be able to get it out.  The smaller one would be good for things like tacks, screws, curtain hooks, and things like that.
 
 
I took some craft paper that I've had around and hot glued it to the jars.  Then decorated two with ribbon.
 
 
I think that they turned out pretty cute for my first time trying this but I think maybe they will be better with the caps spray painted white and some labels.
 
 
Here they are on the window sill going down to the basement. 

 
A little more organization is needed but for now not a bad start.
.
Do you have junk drawer in your house? Does it ever get out of hand and what crafty ideas do you have to solve your junk drawer dilemma?
 
 
Pin It

Tuesday, August 7, 2012

Zucchini; stuffed pepper style!


A friend of ours brought us over some fresh zucchini from her garden.  We love fresh vegetables in our house.  Sadly I don't have enough steady sunshine in one area to grow a good vegetable garden of our own.  At least we have great friends that will bring us over some fresh veggies through the summer from there's.  Anyways, on top of bringing us some wonderful vegetables she also gave us a great idea for how to cook them.  She suggested cooking the zucchini stuffed pepper style.  Just slice them length wise down the middle and scoop the seeds out. Stuff them with whatever you would stuff a pepper with like rice mixed with spaghetti sauce.  Bake them until the zucchini is cooked and cover with cheese if that is what your family likes (and that is totally what our family likes!)


Let me tell you, these stuffed zucchini came out soooo good! Where has this dish been all my life! It needs a little tweaking to add a little more flavor but all in all this is an awesome summer recipe.  Yum! 

Friday, May 4, 2012

The China Cabinet

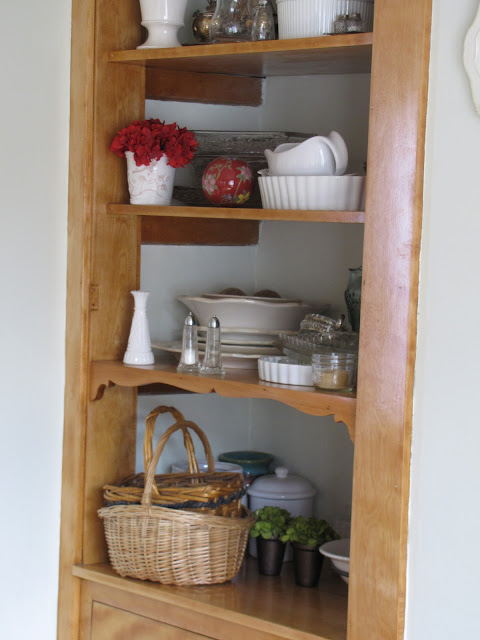
My most recent project has been to go through and clean out the china cabinet.  It holds no actual china but I like it all the same.  I guess you could also consider it a small built in buffet.  I use it as that from time to time. Mostly Thanksgiving and Christmas. 

I like to display all my white dishes front and center.  I love the clean and crisp feel it gives.


We are so happy with the woodwork. The dining room with this built-in china cabinet is the first room we have refinished the trim work in.   It was quite the project but well worth it in the end.  Our home was built @ 1900 and has maple woodwork all through out.


This shows the full length and the three drawers underneath.


Just a few more to get the full effect.  Plus, it was a nice bright day and taking pictures is sometimes just plain fun!


Thanks for visiting and I hope that you have pleasant weekend!


Pin It

Monday, April 16, 2012

Fabric Flower Rosette

Hey Everyone!!!  Hope everyone is doing fantastic and enjoying the spring!  I've been catching up with some well needed yard work and gardening during this past weekend. 
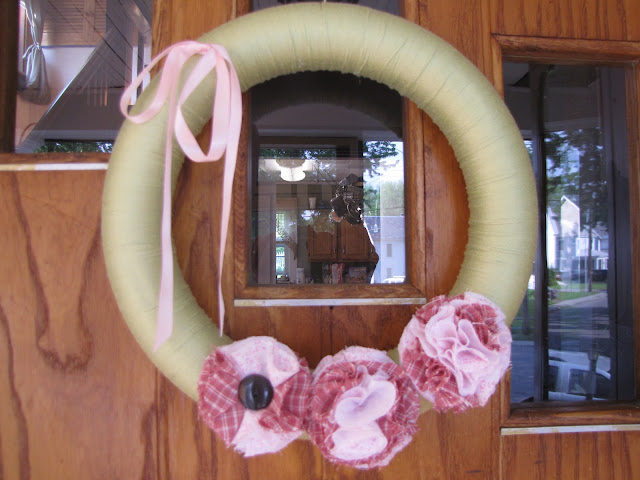
 A little while ago I finished our spring wreath that I revamped from last years summer wreath.  On it, I added a bunch of these fabric flower rosettes.   I thought I would do a quick tutorial for anyone who hasn't done them yet.  They are super easy to make and I love that you can tweak them and make each one a little different. 
Okay, here we go.

First you cut your fabric into a strip.  I make mine as long as the width of a bolt of fabric and about two inches wide.


Next, I put a dot of hot glue in the top corner
and fold the fabric in half.


Okay, and another dot of hot glue and fold in half again.


Fold the top down like a triangle and glue.  Then keep folding for few and gluing as you go.  You should see the center form. 


Now, twist the fabric as tight or as loose as you want and keep going around and gluing every so often. 


You should see your flower start to form.


When you are all done hot glue the tail to the back.  You may also cut out a circle of felt slightly smaller than the flower and hot glue it to the back as well.


I love making these because they are SO easy.  Hope this tutorial gave you a good idea of how to make them.  I have a tutorial here for another kind of fabric flower that is also super easy. 

Thanks for staying with me and happy spring!!

xoxo 


Pin It

Monday, April 9, 2012

Summer Wreath Revamp

Hi all!! Hope everyone had a great Holiday and a great weekend. Ours was crazy and full of lots of excitement and chaos.....just the way we like them around here!!! 

 With the anticipation of holiday guests I had the idea to revamp our summer wreath from last year.
This is what it looks like now. 


This is what it looked like last year.


I had a few different ideas for the wreath like wrapping it in burlap and then adding a lace but I decided against it.  Instead, I made some burlap and white fabric rosettes.  I took off the old flowers from last year and replaced them with the new ones. I also took off the pink ribbon and have just a piece of twine to hang it with.  I kind of like its "shabby" appearance!! 


Hope you like it.  If you do I would love for you to pin it.  Happy Spring!!

xoxo

Pin It


I linked up to these fabulous parties!!!