Friday, December 6, 2013

Going two tone; a dresser makeover


This old beaten run down dresser has been in our attic since we moved in three years ago.
IMG_4387
  Finally this past September it was time to bring her down and breath new life into her.  Our TV nook was lacking any sort of style  as you can see here:
MRL-TV-NOOK-BEFORE
I had an idea how to fix this corner up and thought the old dresser could help me out. 
The living room is full of mixed tones including a white parsons desk and white picture frames, natural trim on the door casings and a dark finished shelf.  I thought if I took the dresser and painted it a two toned white and natural combo it may help to pull the other pieces in the room together.  Plus I’ve seen it done on pinterest and love the turn out. 
The first step was to pull the dresser down from the attic.  We put it on the porch and there it sat for a while until I was able to get to it.  When I finally got around to it the first thing I did was to clean out the drawers with water and vinegar.
IMG_4389
This helped to clean out all the dust and dirt and get rid of the musty smell that was lingering.  Then the drawers came out for Mike to sand and the rest was in the kitchen for me to paint.
IMG_4446
I wiped it all down inside and out first so that I’d be working with a clean surface and then I primed it with one coat of primer.
IMG_4449
It didn’t take long to dry before I could add the first coat of semi gloss white.  The trick is, in my opinion to apply thin even coats and let them dry completely before applying another coat.  On some of the detailed work and around the rounded edges I used a sponge to help me apply an even coat. 
IMG_4452
It took pretty much all day and about 4 coats of paint to get the finish I was after. Here’s what I had at the end of the day:
IMG_4458
While the paint was drying I stepped out onto the porch and applied a coat of polyurethane to the drawers after Mike was done sanding them.  This you definitely need to let dry in between coats to get a nice smooth finish.  After the first coat was dried, I lightly sanded it with a fine grid sand paper and then gave it a second coat.  I probably should have done three coats but I was anxious to get it done in one day. 
IMG_4464
As for the hardware on the drawers, I just brought them outside onto a piece of cardboard and spray painted them gold.  The next morning I brought in all the pieces and put the dresser back together. I have to say, I was very pleased with the turn out.   Not only is our TV nook looking a lot better, but it did just as I had hoped and pulled the rest of the room together.  I really like the flow that we’ve got going on now.  It makes me so happy to see a room finally coming together. 
IMG_4866
IMG_4865
IMG_4870
So here you have it again, the before and after:
MRL-TV-NOOK-BEFORE
and after;
IMG_4866
Sooooo much better!! Were so happy with this dresser makeover.  Not only did it help to pull our room together but we did it with out spending a dime and using supplies we already on hand.  Pretty much a win, win!!

Friday, November 1, 2013

I heart hearts!


I heart hearts!
 
Blue dress, $47 / Heart shelf

That dress is so adorable and if I could only think of the perfect place in my home for that shelf, it would be mine!!

Happy Friday.

Monday, October 28, 2013

Sunday, October 20, 2013

Finding some geometric art inspiration

This Sunday I plan to do a few chores around the house and yard and then spend some time designing greeting cards for the upcoming holiday season.  I did a little search this morning for some inspiration.  I found a great stamping tutorial by Emmadime that you should check out if stamping might be your thing.


Geometric design inspiration


Saturday, October 19, 2013

Washi tape in the kitchen


I painted the walls in my kitchen way back in the early spring and I couldn't be more in love with the color.  It's an awesome grey-ish green shade called techno grey, from Sherwin Williams.  After nailing the right paint color, I had visions of colorful artwork in white frames finishing up the walls. I've seen such beautiful inspiration for this idea on DIY blogs like this one and this one and it definitely seems the direction I want to go in.  I've been thinking and thinking about what I like and trying to save our pennies for just the right materials.  In the process of saving for this project, I realize our kitchen is due for a major overhaul someday and until then I'm just trying to make it a place I feel happy in and enjoy until that day comes. I've decided it's a good time to perhaps step out of my comfort zone and use this time to also experiment with things I wouldn't normally do.  Like use washi tape as picture frames instead of going out for nice white ones right now.  I've seen it on pinterest and thought it was such a cute idea for a work space, I wondered how it work in a kitchen.  So, I've decided to give it a try in mine.

Here's my kitchen after making the attempt:


I added some detail to the door as well after seeing it done in neon pink also on pinterest.  I'm still in the phase of 'I think I need to live with it a while' but part of me really likes it!  My fear is that it may give the kitchen somewhat of an immature look.


 I've also been playing around with a family command wall in the kitchen and did a calender in the washi tape as well.


I like it.  Perhaps not long term but for now I'm enjoying it and so are the kids.  There drawn to the color and that was ultimately my goal; to add color and style.  What do you think?


Images: All Ivy Bingham for My ruffled life


Tuesday, October 15, 2013

Fall Decorating

To warm up and cozy up my decorating for fall I've fallen in love with a few simple items.  Gold!!?? Yes, please!! I'm completely smitten with it and I've been using it everywhere!  Weather it be in the form of spray paint or a metallic sharpie, it's helping me add warm and elegant touches all through out my home.  Washi tape is the other fabulous home decorating accessory that has hit me like a tidal wave.  There is only like, um....a MILLION uses for it!

 Fall Decorating

1. Krylon Premium gold spray paint.
2. Metallic Sharpies.
3. Japanese washi tape.


Images: Polyvore collage by Ivy Bingham 

Thursday, August 22, 2013

Can wishes really come true??

So my little girl comes into my room tonight just after I tucked her in.  She says mom… Yah sweetie… Well, you know how you make a wish on the star at night?  Yah…..Well,…. what happens if you make that wish night after night and it never comes true?

Pause….At this point I am thinking ..okay, this is one of those times I need to think of the perfect something to say, make it quick and make it good.  Its needs to be memorable and exactly what she wanted to hear.  The first thought that came to my mind was reciting something I heard from a Disney movie. 

Well, you know Molly, a wish will only get you half way. You have to work hard to make your best wishes come true…

What do you mean?

Well, I mean a wish is your desire, your dream, in order to make it come true you have to work for it.  Try hard to make it happen.

Well, I don’t know how I could do that…

Another pause, at this moment, I realize I know what her dream is.  Her dream is to fly. She wants to soar through the air like the birds, sit on clouds and dance among the tree tops. I know this is her dream because I’ve heard her talk about it a million times.  Because it was my dream when I was her age.

Well, some wishes Molly, are meant to come true only in our dreams.  What’s your dream?…..To fly?….

Yah, its been my dream for a long time.  And I know you can only fly with wings or pixie dust…….. 

Or, in your dreams…

Well…

Let me show you.  Just lay down.  I helped her to lay down on the bed.  Now, close your eyes.

Sigh, Mom…

Trust me, close your eyes……

I smoothed her hair out of her face, I stroked my finger along her forehead…

There you are, outside in the backyard, beneath the Maple. You look down and see your toes nestled in the cool grass. You look up and see the blue sky.  Its a perfect blue sky, the exact blue that beckons to you. You raise your hands up high and tilt your head to the sky, You can feel your feet leaving the earth, leaving the cool grass as your feet slowly pick up off the ground.  You can see yourself getting higher and higher closer to the tops of the trees. You fly your body around in circles, your toes dancing off the leaves.  And then you spring up, even higher and higher you go, the wind pressing against your face, your hair billowing behind you.. until there you are, flying around in the clouds. The perfect clouds, the kind that look like there made out of marshmallow.  You turn around and sit down onto the cloud and you sink into it, like your sitting on a huge pile of feathers. You throw yourself back and lay down and as you do , you can see whispers of the cloud float off into the air.  You move your arms up and down as if to make a snow angel, feeling the clouds airy softness.  You roll all around in sheer delight, nothing but blue sky and clouds all around you. When you decide, you lift yourself off and fly back down to the maple where you can hear the birds singing. You stop, and you look at the birds, you look them right in the eye and surprisingly they smile at you, they smile at you because at that moment they know.  They know what it is that you now know.  Something so incredibly special. And you smile back.

You let yourself come back to the earth, slowly falling down until your toes have met the smooth, cool grass once more.

So, could you see yourself flying….

With a big smile, Yah….

Tuesday, August 20, 2013

The Hearts Have It

This past weekend was busy.  The boys are all still baseball, baseball, baseball even though the season was over weeks ago.  Now they have a special “Sunday” program to keep them in it and learning for next season.  I’m so over it I can hardly stand it but it makes all three of my boys happy so, whatever! Any who, it was also my daughter’s 8th birthday party. She had a simple yet lovely little party and will share a few details later.  What I was wanting to share now was the project I fit in amongst all the commotion of the weekend.  My two lovely new heart signs. I think when it comes to these signs the ‘hearts really do have it!’

Meet sign #1

 IMG_4214  


  IMG_4220

 IMG_4223

 IMG_4225

 IMG_4226


and sign #2.   

IMG_4211

 IMG_4215

 IMG_4216

 IMG_4217

 IMG_4218


They are made from repurposing the wall paneling that came out of our kitchen.  Before I made the signs, I sanded down the wood really well so it was nice and smooth and then added a dark walnut stain.  Next, I applied two coats of polyurethane to seal and protect the wood.  After I painted the sign, I sanded it a little to give it a distressed look.

I think my favorite is the yellow heart but I could really see the multi heart one in the girls room. 

So that’s it. Thanks for stopping by and if you liked what you saw I would really, really, really love for you to share it. Thanks so much! xo

Tuesday, August 13, 2013

Office Space in the Living Room

For me, it is imperative to have a work space that is in a common area of the house.  With my own kiddos and the daycare, I don’t have the option to go very far.  I thought long and hard about this and tried to decide which room this would work best in.  I had the options of the kitchen, dinning room, or living room and none of these rooms are overly spacious.  I toyed with different areas in different rooms until it was determined that the living room was going to be my best fit. It just so happens the living room was the one room I was trying to avoid.   I did not want to invade the living room space.  I had visions for the living room, wonderful visions of a well placed sofa and magazine article ready decor, and nowhere in these visions was there a place for a desk or work space.  The other rooms were ideal for adding office/work space, but alas they were just too small with no workable options.  I had no other choice but to give the living room a shot at it.  I reluctantly placed a parsons desk in a corner of the room and stepped back to take in the results.  As I stood back and starred at it I became glad I gave it a try.  The more and more I looked at it, the more it grew on me, and I began to like it.  Now, I may actually even love it. It turns out the desk flows nicely with the room and gives me space among my people to do what I need to do. 

IMG_3942

IMG_3944

 IMG_3947

 IMG_3949

  IMG_3951

 IMG_3953

 IMG_3954

   IMG_3958

 IMG_3959

  IMG_3964

 IMG_3965

I still have some tweaking to do.  I need to figure out something better for seating instead of the old storage ottoman and perhaps add some shelves for a place to stick all of my things.  I’m thinking I would also like to update the lighting to something wall mounted, I’ve seen some great ideas lately that I just can’t get out of my head. What are your thoughts on office space.  Would you ever add a work space to your living room?  Do you need your space separate from all the commotion going on around you, or are you like me and need to be right in the middle of it? 

Images: All Ivy Bingham for 'My Ruffled Life'

Sunday, August 11, 2013

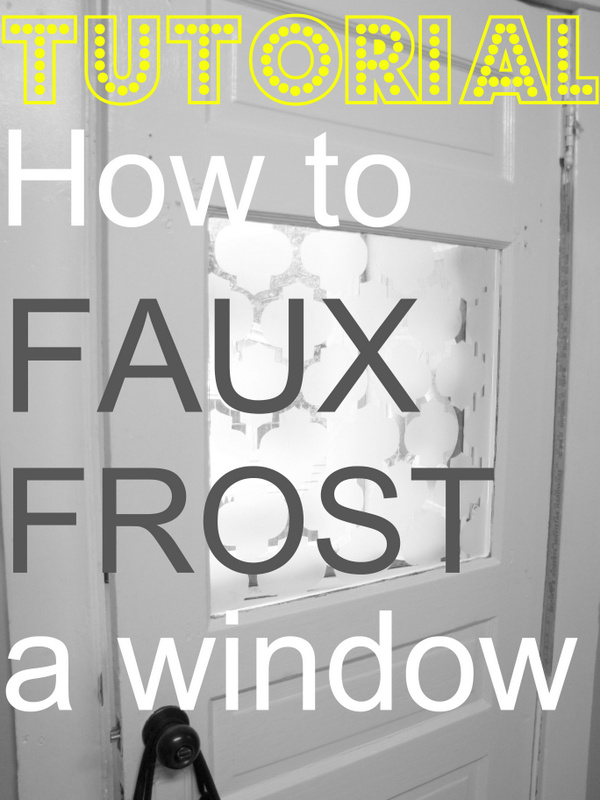
Faux Frosted Glass Window

Technorati Tags: ,,


Our back door was in desperate need of help.  Its an old door with the window cut out in it. 
To cover the window, I’ve been hanging a curtain there but no matter which one I tried I have not been happy with its over all look in the kitchen.  I want the window covered to help filter out the morning sun (its an east facing window) and also to cover the deep dark scariness that it becomes at night.  After a while I just took the curtain down but I hate hate hate strongly dislike walking into the kitchen at night just to have that gaping hole of mysterious black lurking there and wondering what is beyond!   I had to figure out something!

I searched for solutions and learned about a trick to faux frost a glass window super easy for super cheap.  All you need is a stencil and some contact paper!

This is the door before faux frosting the glass
IMG_3547
 
The steps are pretty simple; just a little time consuming.  First, I needed to decide on the pattern/design that I wanted.  I liked a quatrefoil pattern that I had on a magazine holder and I decided that was the pattern I was going to go with.  Now, as I sit here and write this, I realize that I should have just photo copied the magazine holder and then enlarged the pattern for my perfect stencil.  That would have been a great plan and super easy, however, I didn’t do that! Out came the graph paper and I painstakingly designed my own!

IMG_3554

I measured, erased, drew, erased, measured, drew, and erased, and drew some more until finally, I had what I wanted! (Phew, ever get indents in your finger from a pencil?)  I traced my shape onto cardstock, cut it out, and had my finished stencil.

IMG_3559

With the stencil ready I then had the job of tracing it over and over again onto the contact paper.  You’ll want to settle in for this part because it takes a while ( is there a movie you’ve been wanting to watch?)

IMG_3562

After all my tracing and careful cutting I had all my shapes ready. 
Lining my shapes up on the window was a little tricky.  I wanted to get the right effect that the glass came that way and so I had to do a little planning.  I worked it out so my whole shapes started a few inches towards the center of the window and the pieces I cut were on  the border to give the look the glass was cut that way. 

You can see in this picture how I have shapes over lapping the edge onto the door.  This was so I could cut them with a razor blade along the edge of the window.

IMG_3563

I went slowly and carefully so to make sure my shapes were lining up to create my desired pattern.  I had to place each piece on very carefully to avoid a large amount of bubbles.  The bubbles I did have, I worked out by rotating using a dry cloth and plastic scraper. Using the dry cloth,  I rubbed in circular motions from the center of the contact paper out to the edge.  The plastic scraper was best used by running along the contact paper in a straight line.  Some of the bubbles I just ended up chasing to the edge with my fingertips.  After I trimmed all the outside pieces and got as many bubbles out as I could, my project was complete!

Soooo, a confession! Shortly after this project was completed, I found myself a little unhappy with it because the contact paper still had some very notable bubbles.  But after a few weeks I saw that the bubbles were disappearing and this made me very happy!  I think it was because of the sun heating it slightly and somehow helping to work the rest of the bubbles out but no matter the reason, my faux frosting is now bubble free and perfect!

Here is the window after the faux frosting technique.

IMG_3578
  
IMG_3568

IMG_3573

IMG_3576

IMG_3571

IMG_3572

IMG_3574

IMG_3577

Oooooh, so much lovelier!!

What do you think? I love it! It’s exactly the look I was hoping for.  I like it waaaay better than a curtain and I think the frosted window really helps to update the door.

We’ve definitely had some high temps and high humidity this summer and the window still looks perfect.  The contact paper is holding up beautifully.

So that’s it. What do you think? If you like this and have any questions before starting this project yourself, I would happy to try and answer them the best I can.

Ps. All these pictures were taken right after I applied the contact paper so you can still see the bubbles.  I’ll post an update soon so you may see how much sweeter they look now!

IMAGES: All Ivy Bingham for 'My ruffled life'.